Horse Mandibular Molar Cleaning and Custom Mounting
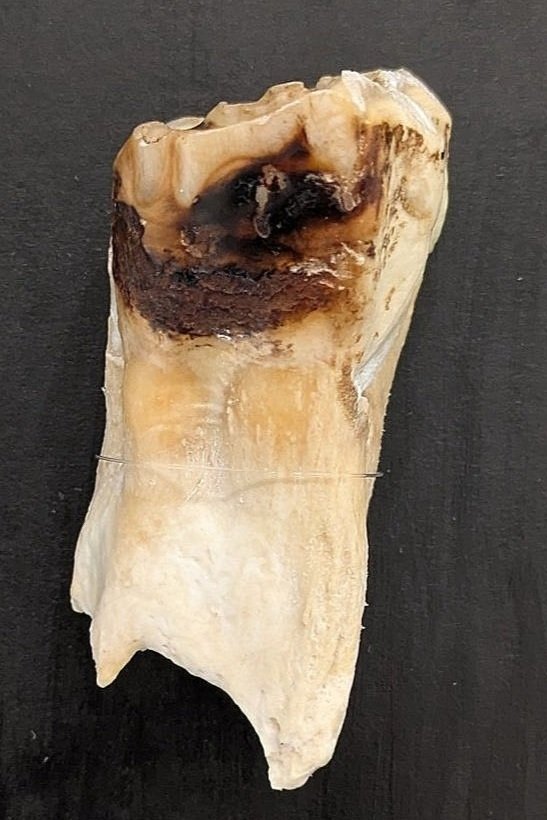
As my first completely independent organic material conservation project, I researched different techniques for removing mucosal tissue from enamel while the tooth remained in cold storage to prevent decay and ultimately decided on maceration due to its accessibility. The tooth presented with moderate enamel and dentine chipping, one small cavity, and some shaved areas due to previous dentistry work. Using scalding hot water mixed with clear dish soap, I softened the remaining tissue and worked slowly to remove small pieces at a time from the tooth using tweezers and dull scalpels in very gentle scraping motions. I also used blunt metal picks to remove remaining pulp and root from the tooth. I repeated this process multiple times, changing the water after each round of maceration. When I felt the tooth was thoroughly cleaned and degreased, I chose to sanitize and slightly whiten the tooth using a 3% hydrogen peroxide soak done in two, three minute increments. I then allowed the tooth to air dry completely and did a final check for any remaining tissue or detritus.

After the first round of soaking in hot water and dish soap, the tooth was significantly cleaned of surface debris, but many pieces of gum tissue remained. The tooth was allowed to air dry on clean cloth between each round of maceration.
The black and brown pigmentation and uneven surface is a natural, permanent result of mineral staining and erosion caused by soil composition and forage consumption, and differentiates what parts of the tooth were erupted at the time of removal.
I chose to mount this tooth in a shadow box for display, and decided on painting the inside of the box and the matboard black to add more contrast and draw focus to the tooth. Preferring an invisible mount that did not adhere to the tooth in any way to prevent further damage to the enamel, I chose to securely attach the tooth to the matboard by looping clear cord below the largest part of the tooth, allowing it to rest securely while remaining easy to remove if needed. This project taught me many new lessons about organic preservation and how taxidermy techniques can influence conservation practices, especially when working on delicate, unique objects.

Small chips in the dentin and enamel below the gingival margin, likely due to mechanical stress during removal, became more apparent post-treatment. A shaved area of the peripheral enamel seen on the top proper left of the tooth, a sign of previous dentistry work, also became more visible.
Wrapping the tooth snugly in clear cord allowed for a secure but visually unobstructed mount in its shadow box. This choice of mount also allows for easy removal with a low potential of damage to the tooth.
The framing and mounting for this object allows the unique characteristics of the tooth, such as staining, natural wear, and overall shape to be the focal point of the piece.
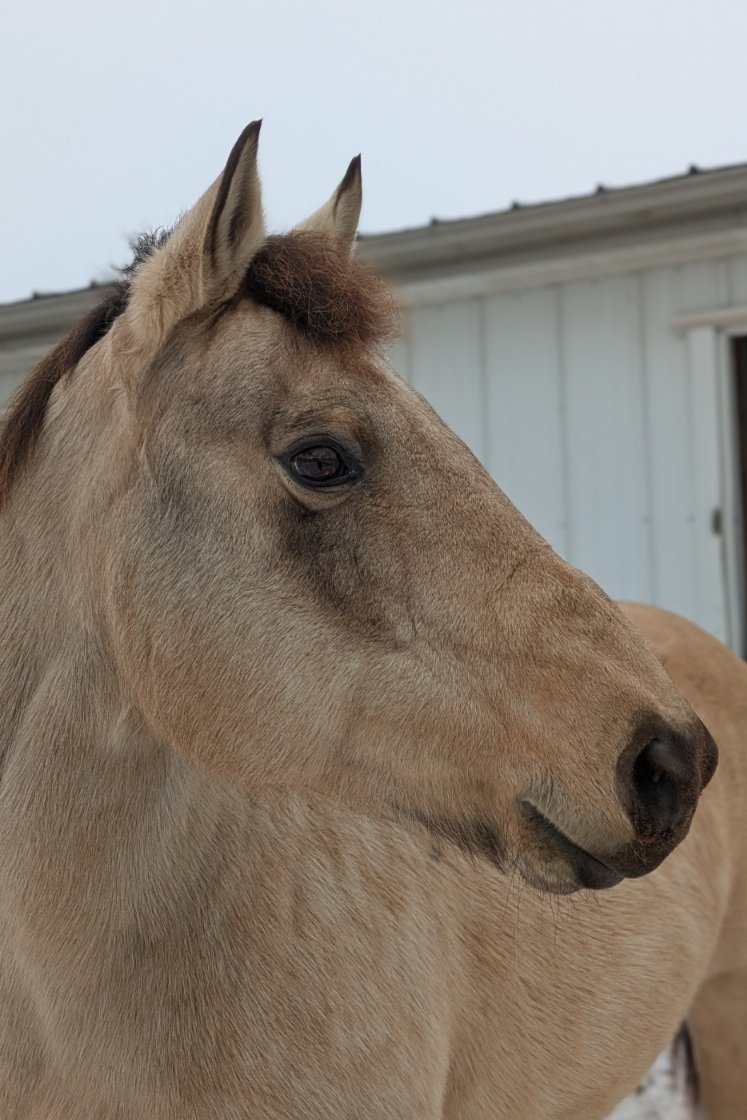
My horse Callie, from whom the tooth was extracted, about a month after its removal. This molar was impacted with food due to age-related wear and was removed for her comfort.